Monday, February 10, 2014

I thought I would put up a quick something for the good old Valentines Day. Super Fast. Simple. Adorable.


Here is the original inspiration
I am in love with the mason jar fads and I use them for everything. If you don't have a stash of jars, you can pick them up at the dollar store or at the craft store. (Hobby Lobby often has glass sales at 50% off)

Here are the supplies I used. I had everything but the doilies. Those I picked up at Hobby Lobby for under two dollars for 30 of them. For the regular size Mason Jar, I used the 4 inch doilies. For larger jars, I would go up a size. 


Using solid red card stock, I used my Silhouette Cameo to create the heart shape I liked. A paper punch can be used or even cut by hand. Just keep in mind the size of the heart in comparison to the doily. 


 Then put adhesive on the back of the heart and center of the doily.


Next, put just a small amount of adhesive in the center of the doily (on the back). 


Just a small amount is needed to keep the items attached to the jar while you add the twine. 


I wrapped the twine around the jar three times. Depending on what you like, keep wrapping, and tie it off. I like the knot and ends to be exposed.  

That's it! These puppies are going to get filled with fun holiday treats and taken to some friends for encouragement. 


I also added them to my everyday decor for just a little hint of Valentine's Day. (In this photo I added one in my craft space. And a hint of that tiny paper banner)

Happy Crafting!

Tuesday, October 22, 2013

Easy Halloween Wreath


Welcome to October! Well, the end that is. Since it is Halloween next week, I thought I would share the wreath that is currently out on my door. I've been super busy and stressed with school and work so any crafting time I can squeeze in is great.

Here you go...


Since I like to save money anywhere I can, I use pool noodles I bought from the dollar store last summer. I know it is too late to find them there now, but you could check out hardware stores for foam plumbing. Or last resort just go to the craft store - with your 40% off coupon of course! I cut the noodle to the size I wanted with a kitchen knife.


Because I only have two hands, I couldn't get a picture of taping the ends together... but you get the point. And all I had was pink tape. I wrapped it 3 times. The first to hold it in place and then one on each side that overlapped slightly for stability. 


For this wreath I used orange tulle. I used about 4 to 41/2 yards depending on how full you want it to be. 


Leave the tulle folded in half like it comes from the store.


 Then cut 4-5 inch strips.
You can do this in sections or do it all at once. I did while watching a favorite tv show.

With each long strip you fold it in thirds like the pictures below.


And then cut the folded sides...


You then will end up with strips that look like this...


Not going to lie here - the longest part was prep cutting and then tying came in close second. 

Take a strip and start anywhere on your form. Wrap a strip around it (the tulle will stretch) and tie it in a double knot.


Tip: try to tie them as close together as possible. When you tie them further apart and then 'scoot' or push them closer together, they just roll up instead of staying flat. 


Keep on tying... keep on tying...
Until you are back to where you started.


Don't stress too much about being able to see the tape because we will cover it up.

If you have some fake spider web stuff, use it. I purchased a pack of it at the dollar store and included the spiders. I stretched a piece of it around the front then over the back and  even through the middle. I just played with it until I liked it and placed some spiders


Back to that tape issue...
I used pieces of felt to make some rolled flowers. Cut out a square of felt and cut a spiral into it. Starting at the END (not the center), roll it and glue the bottom. 

I know that isn't real clear but here is a great tutorial
(link through Pinterest)


The bigger the square, the larger the flower. Cut several flowers of different sizes. Arrange them how you like over the area with the tape showing. 


Use hot glue to secure them in place. 
And ignore how dirty my front door is ... 


And that's it! I use my gray chevron ribbon for all my wreaths or you can use a matching Halloween design. I will have a tutorial later on how I hang my wreaths but for now...

Happy Halloween and Happy Crafting!


Monday, August 12, 2013

Manuals and Warranties

Wow I can't believe it is already August! We took a fun vacation over to the lake and have stayed super busy. This was my view for the week:
It was such a blast but what does that have to do with manuals and warranties? Nothing really. I've been trying extra hard to get organized before school starts. You know that drawer that catches everything in it? Well I finally pulled out that nasty stash of owners manuals and warranties. 


My favorite solution is all over Pinterest. Because of course I'm not the first person to think of this solution. 


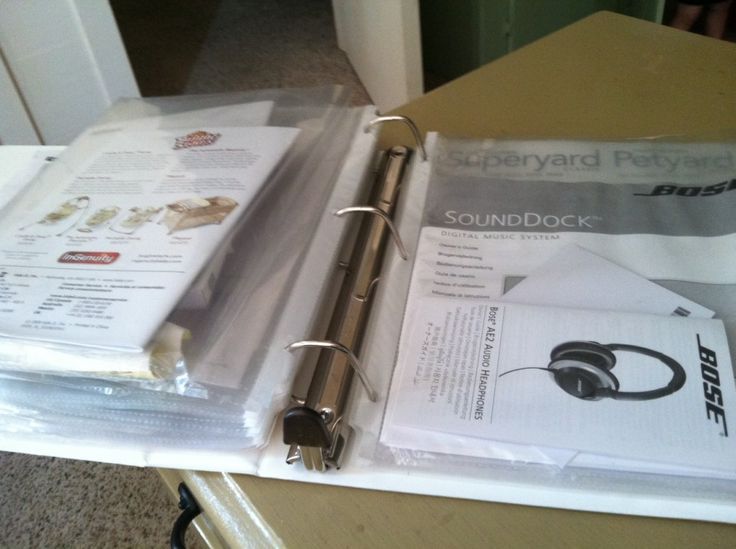
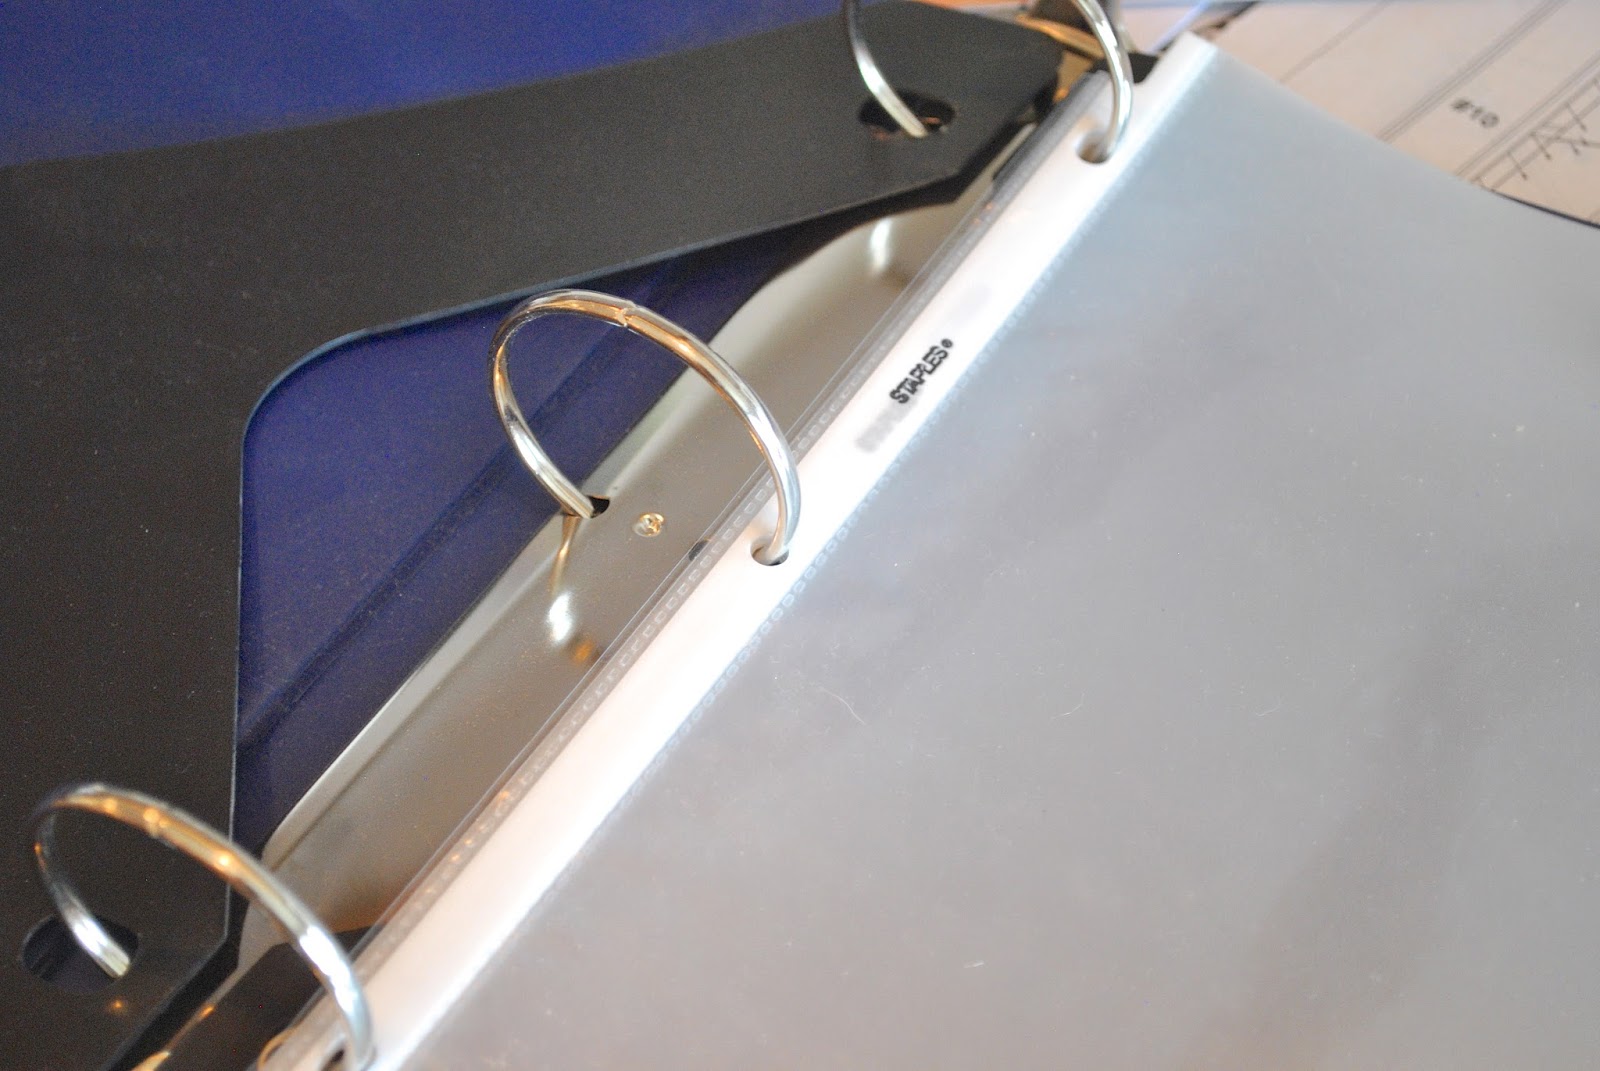
We always have extra school supplies laying around. I used old sheet protectors and an old binder. Essentially, this project could cost you nothing. 


I love this solution because you can refer back to it as much as you need and everything is visible. I put mine on a self with other binders so it blended in just fine. You can make it as fancy as you want or keep it simple. 

Happy Organizing!

Monday, July 29, 2013

Use Baskets to Organize

Lately areas around the house have been collecting all the left over, random items and since we are getting ready to move, I've been tidying up. One place especially are these shelves in our laundry room. Rags get thrown up there, dog brushes and leashes, extra paint, a tape gun, hot glue gun, and everything else.


So on my trip to Ikea, (closest is 2 hours away) I kept my eyes pealed for some kind of basket to organize this mess. I highly believe in organizing with baskets and these are what I came across for about 7 or 8 dollars per basket:


This way each basket was categorized, such as rags or for the dog, and nothing was allowed on the shelves outside the baskets.


It takes away the clutter (or rather hides it) and it doesn't give me anxiety every time I walk in my laundry room to see how messy the shelves are. 

Happy Organizing!


Friday, July 26, 2013

Downy Unstopables


A while back my mom and I were taking a stroll through Sam's Club and we were passing a stand of Downy Unstopables. At the time I remembered a pin from Pinterest so I purchased them. First I started adding them into my laundry and they make my clothes smell fantastic, so bonus. 


The Pin that came to mind was not about the laundry but about melting them in your scentsy wax warmer. I am a lover of scentsy and anything that makes my house smell fantastic. We needed a universal scent for our house (the boys are very particular) and we are getting ready to sell our house. So why not fresh laundry? 


Simply put in a layer of scent beads and melt away; but never leave the burner unattended or burn for excessive amounts of time. The scent was so good and filled our large two story great room. I have since put one on each floor and keeps our house smelling fantastic. 


There are some people who disagree with the melting of these scent beads but I haven't had any trouble with them so use at your own discretion.

Monday, July 22, 2013

5 Minute Card


Last week I was assigned to visit some girls in our ward that are less active. Just in case they weren't home, I wanted to leave a little note of encouragement. Or this little card is fun for any time. I used scrapbook supplies I already have and made one in five minutes-seriously 5 minutes.


Supplies:

  • Cardstock
  • Stamp 
  • Stamp ink
  • Washi tape
  • Edge punch
I always have these packs of paper that are pre-cut because I buy them when they are half price at Jo-Anns or Michaels. If you don't have them, cut your choice of paper (patterned if you'd like; mine was plain) to 4x6 or 4.5x6.5 or what ever size you need. 
Then fold it in half.


Next I used a paper edger to trim just the front edge of the card. I am such a cheap scrapbooker that I only have a few paper edgers and this one is my favorite so use whatever one is your favorite.


I love, love, love the one dollar bins at Jo-Anns because I can find these tiny rubber stamps. I chose to use a simple 'hello' stamp. Use whatever stamp you like/need to convey your message. For these cards, we used them to invite girls to our ward and make them feel welcome. 
So get that little message stamped on there with some basic ink in whatever color you'd like.


I am going to admit it-yes; I am still new to the washi tape bandwagon so I am still looking for ways to incorporate such fun colors and prints into projects. I picked out three colors I liked together and ripped off at varied lengths and placed on the top left corner of the card. I made it overlap so I could trim it to match the crease of the card exactly.  


Trimmy-trim-trim.


And that is it! super fast card for any occasion. For such a long post it really only took me five minutes. I think it took longer deciding which stamp to use haha. And each one ends up totally unique and handmade by you!

Enjoy making quick and simple cards!